Microsurgery Essentials: Practice Models
Several models are described here. Use the simple "Practice Card" to get down the fundamentals of suturing and knot tying. As you become more comfortable, progress to the "Chicken Foot" model and other more "high fidelity" practice tools.
Practice Card
Supplies:
- Strong posterboard
- Surgical gloves
- Scalpel
- Scissors
- Ruler
- Pen or pencil
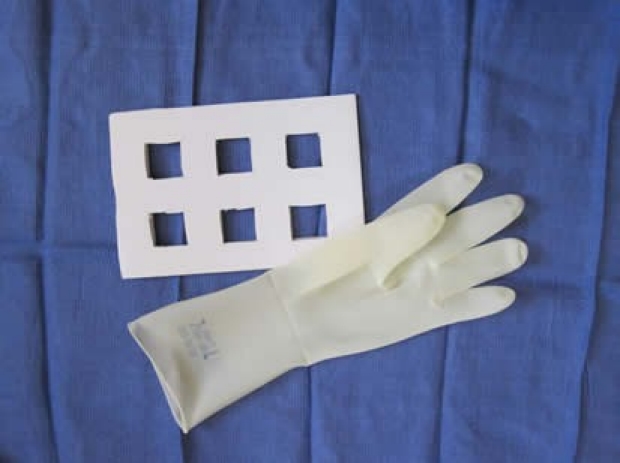
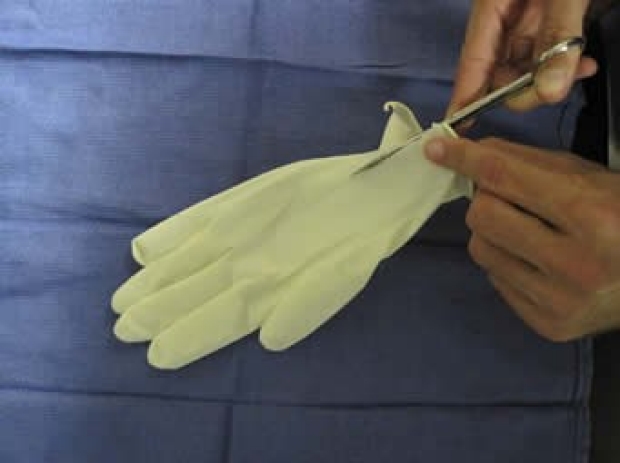
Use the practice card to learn basic suture passing and knot tying. To make the card, take a piece of strong posterboard or cardboard. Measure it out to 18 cm x 12 cm. Cut out a series of squares that are 2.5 cm in size. You should be able to fit about 6 squares total. Take a square piece of latex cut from a surgical glove and stick it over the cardboard. Tape it into place.
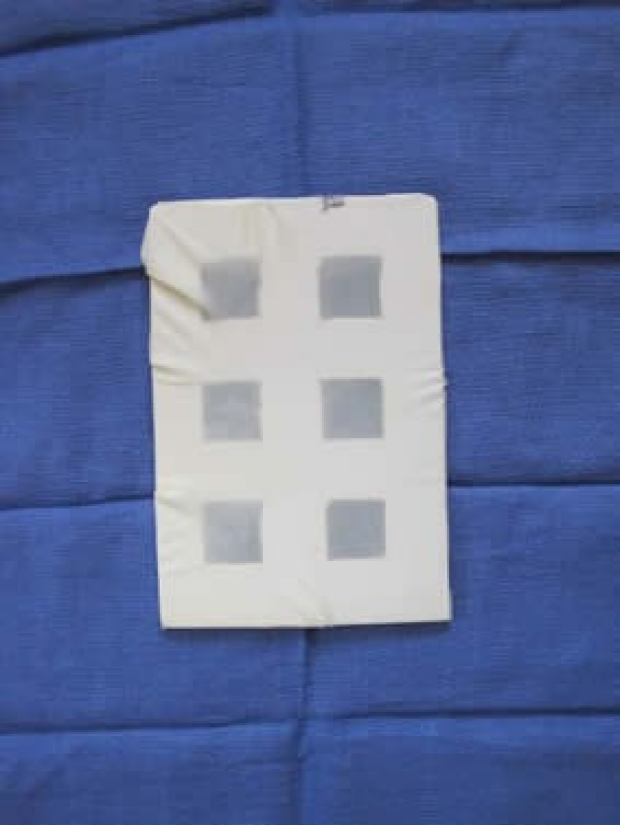
There should be just enough tension to get the wrinkles out. When using this practice card, it should be taped down to avoid unwanted movements. Once you have the practice card made, the latex can be changed as needed between practice sessions.
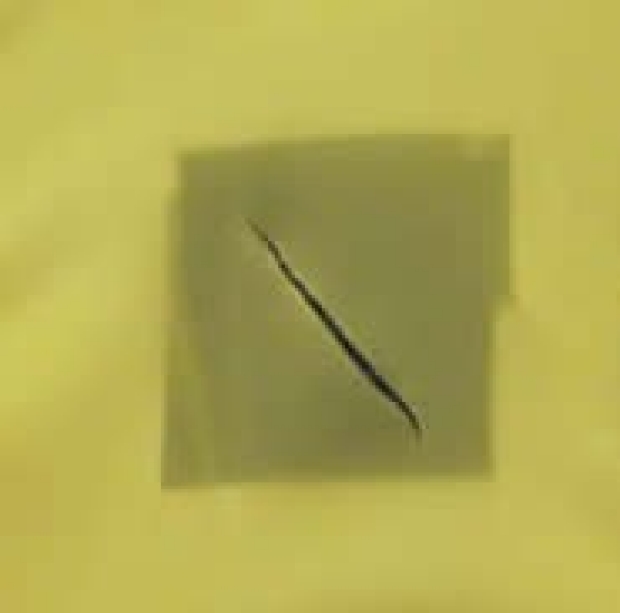
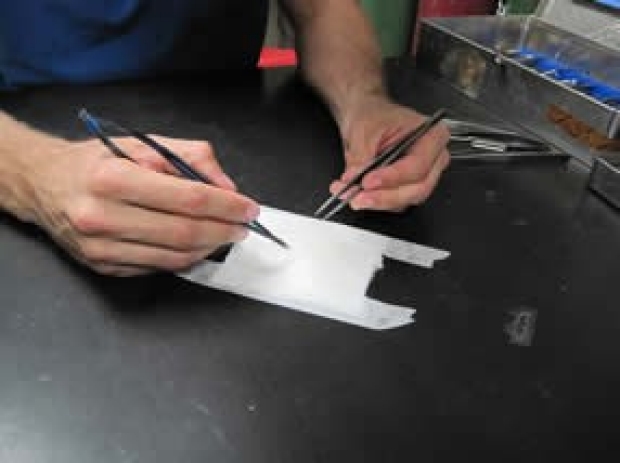
Multiple incisions can be made throughout the latex in different directions to allow you to practice suturing from various angles. Turn the card over, and under the microscope you can inspect the stitches for equal spacing, equal distance from the edge, parallel orientation, and equal tension.

Challenge yourself: When starting out, position the incision so that the incision runs from top left to bottom right. When you’re comfortable in this position, turn the practice card so that the incision runs in different directions. In order of difficulty: horizontal, vertical, top right to bottom left (“backhand” position). Then try reversing the roles of your hands.
Gauze and Tape Model
Supplies:
- Latex surgical glove
- 1" paper tape
- Sharp scissors
- 4x4 gauze
This model is a variation of using a latex glove. By incorporating paper tape over the latex, it simulates "adventitia" to create a more "realistic" vessel. The model is thicker than latex alone, and it allows easier manipulation of the external surface (as you would do with the handling of adventitia on a real vessel).
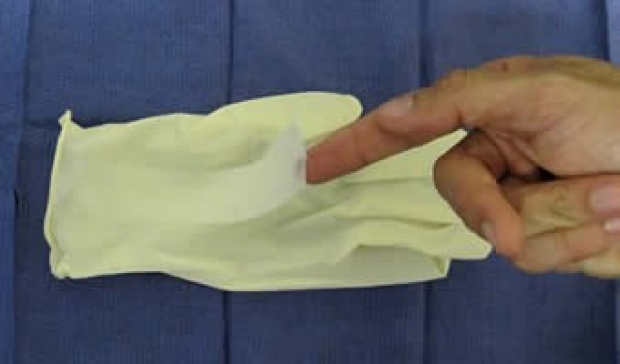
Obtain a latex surgical glove. Place approximately a 6 cm piece of 1" paper tape over it.
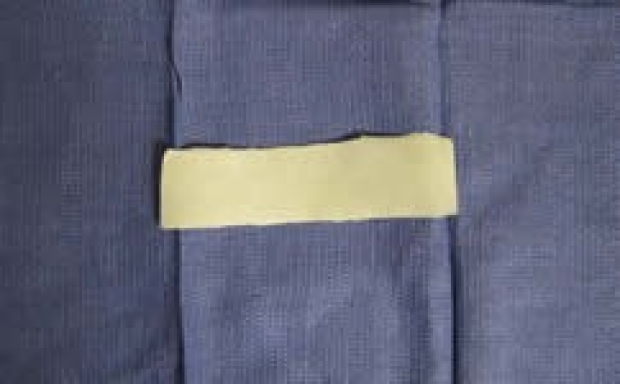
Cut along the edges of the tape, leaving you with a tape-latex unit.


Attach this tape-latex unit to a 4x4 gauze using a piece of tape along the long edges. Incise down the middle of the tape-latex unit length-wise using scissors, then secure the ends with additional tape.
Lightly moisten the tape and gauze with water. Secure the entire construct onto the table with tape, and it's ready for use.
Chicken Foot
Supplies
- Chicken Feet
- Cutting board
- Suture removal kit
- Disposable forceps
- Scissors
- Scalpel (10 or 15 blade)
- Loupes
- Rubber Bands
- 10 cc syringe
- Blunt tip filling needle
- Water
- Purple or blue nitrile gloves
- 2 x 2 gauze
- 9.0 Nylon
- 5.0 Vicryl
- Microsurgery Instruments
(For Stanford trainees: Supplies will be housed in the Plastic Surgery Offices. The surgical microscope is located within the laboratory of Dr. Geoffrey Gurtner. It is located on the second floor of the Hagey Lab, 257 Campus Drive, room GK209. Be sure to sign in prior to using the microscope. Early mornings, late afternoons/evenings, and weekends tend to be the most available times.)
Dissecting the Vessel:
Chicken feet will be kept in the freezer in the Plastic Surgery Office. They will be in ziplock bags, with 3-4 feet per bag. To defrost, place in hot tap water for 20 minutes. Once defrosted, place the chicken foot on the cutting board. Be sure to choose the largest feet for your exercise, since they will have bigger vessels.
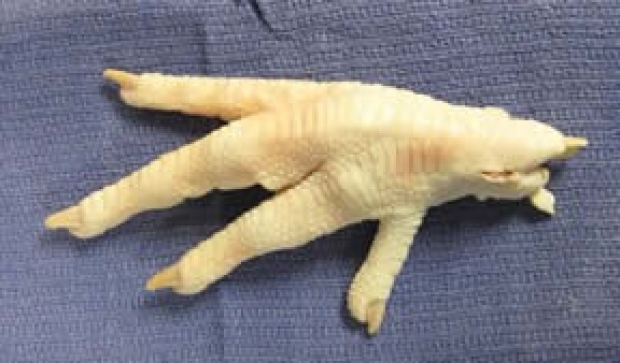
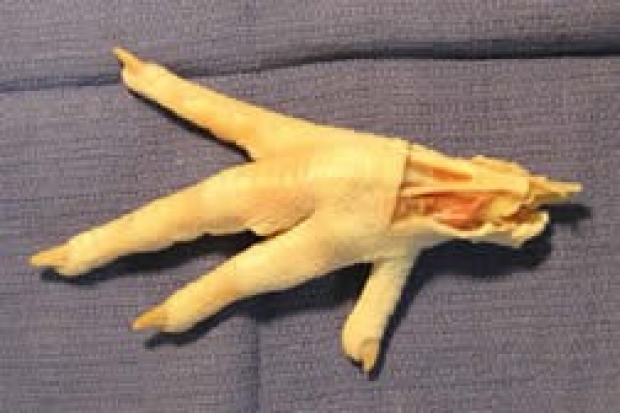
Wearing your loupes will help with the initial dissection of the dorsal vessel. Using the scalpel and scissors, excise the skin off the dorsal aspect of the foot. The underlying extensor tendons will be exposed.
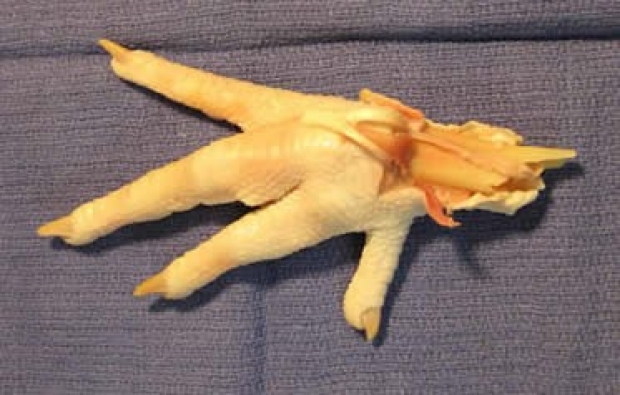
When you lift up the extensor tendons, you will find the dorsal neurovascular bundle beneath it, closely adherent. Fold the extensor tendons over for ease of exposure.
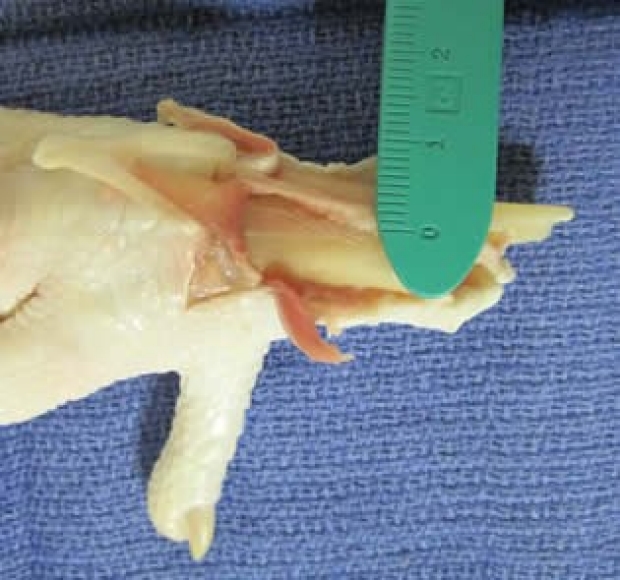
Grab the end of the vessel with the forceps, and use sharp dissection (scissors and scalpel as needed) to gently detach the vessel from the extensor tendon. You should be able to dissect out a vessel 2 mm in size.
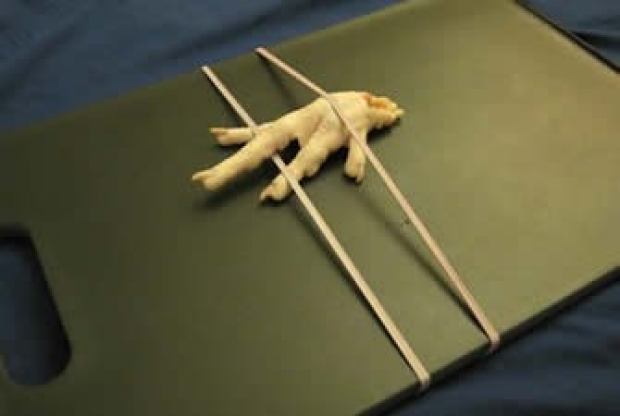
Once the blood vessel is dissected, place the foot onto the middle of the cutting board and secure it by placing 2 or 3 rubber bands around the foot and over the cutting board.
Setting Up:
Place the chicken foot under the microscope. Turn the light source on and put it on the highest setting. Arrange your body position and your microscope appropriately as described in "Getting Comfortable."
The room in which you will be practicing will already be supplied with microsurgery instruments and sutures. Inspect the instruments to make sure they are in good working order.
Vessel Preparation:
Clean the vessel further under the microscope. Use the curved dissecting scissors to free tissue off the vessel. There may be a nerve attached to the vessel that should be stripped off. Get the double clamp. Move each clamp to the end of its slide. Place the double clamp over the vessel using the Rizutti clamp appliers. Cut out a small square piece of the nitrile glove to use as a background for contrast. With micro scissors, cut the vessel midway between the clamps. Remove any surrounding adventitia from the vessel ends with the scissors. Adjust the clamps so that there is about one vessel’s width between the two vessel ends.
Use the vessel dilator to stretch the vessel ends to about one and one-half times their natural size.
Throughout the exercise, you can keep the vessel moist by applying a few drops of tap water using the 10 cc syringe with the blunt fill needle attached to it. Excessive water can be absorbed with gauze or pieces of paper towel.
Suturing:
Your first 2 sutures will be stay sutures which are used to help stabilize the vessel when placing additional intervening sutures.

Stay sutures should be placed in 2 passes. They will be placed 180 degrees from each other.
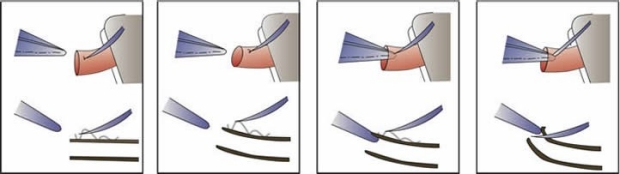
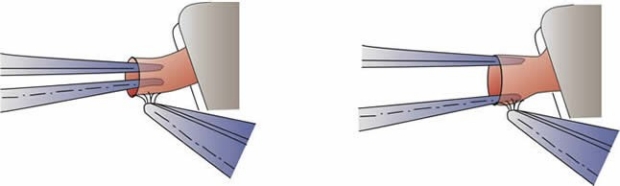
When placing the first suture choose a spot that you can see and handle easily. With your left hand, place the tip of the forceps into the lumen of the vessel. Pass the needle through the vessel wall with a slight downward push against the tip of the forceps. This will create eversion to allow the needle to pass through the wall at a perpendicular.
Pull the needle through the vessel wall with your forceps following the curve of the needle, and re-grab with the needle holder.

To make the exit bite through the other vessel, bring the needle tip to the point where you want it to come out. Place the tip of the left hand forceps against the vessel wall just beyond this spot. Pass the needle tip through the vessel wall with a slight upward push against the tip of the forceps, allowing the needle to exit the wall at a perpendicular.
Tie the suture as a surgeon’s knot (Tying a surgeon’s knot may be difficult in your initial practice sessions, so you may just do a single throw until you become more comfortable.). Make sure each of your knots is squared.
Cut the short tail of the suture close to the knot.
Wrap the long end of the suture around the suture-holding “cleat” of the clamp frame in a figure-of-8 fashion. (Note: In the OR, you will be securing the stay sutures around a self-made notch in the background, rather than around the clamp frame.)
For the second stay suture, pick a spot that’s about 180 degrees away from the first stay suture. Place the stitch in the same way that you had done previously, and loop the long end around the cleat to hold it in place.
Now you can place sutures between the stay sutures. (Dr. Lee prefers the technique in which all the sutures are tied after they have been placed. This may be difficult to do when you’re just getting started with microsurgery, so you may want to practice placing and tying one suture at a time until you’re more adept). Evenly space your sutures.
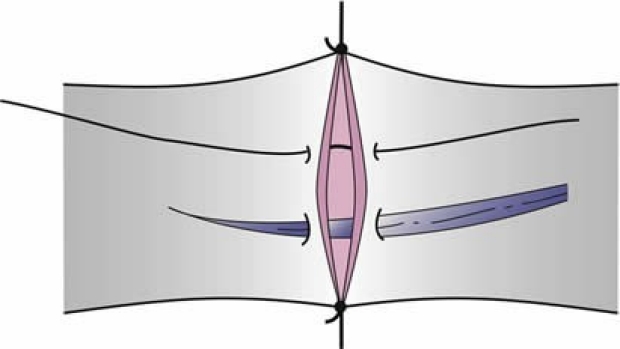
You should be able to place 2 or 3 more intervening sutures. Start near the stay suture farthest from you, and work towards yourself. Try to perform each stitch with only 1 pass (this differs from placement of the stay sutures which are placed with 2 passes). With each stitch, leave an adequate loop of suture to allow you to tie. Once all stitches have been placed, cut the loops in the middle. Then tie each strand successively, starting with the strands near the stay sutures and working towards the middle. You only need to cut one tail off each knot; leave the other one long which then you can use as a handle to manipulate the vessel as needed.
While you are suturing, take steps to avoid going through the back wall.
- Have the tip of your needle pointing horizontally along the surface of the vessel, never pointing down into it.
- Always see where the tip of your needle is going – never guess.
- Lift up the wall you are suturing to separate it from the back wall. You can lift up the wall by using the tips of your left-hand forceps inside the vessel, by picking up the adjoining suture, or by picking up the adventitia.
Turn the clamp over, and cut and release the stay sutures from the clamps.
Patency Testing:
To assess patency, fill a 10 cc syringe with water. Apply a blunt fill needle to the syringe. Place the needle into the proximal end of the blood vessel and secure circumferentially with a 5.0 Vicryl suture. Slowly infuse water, and check the anastomosis under the microscope for leakage. You can also assess your anastomosis by using the microscissors to cut your vessel longitudinally across the anastomosis. Under the microscope you can inspect the stitches for equal spacing, equal distance from edge, parallel orientation, full thickness bites, vessel wall eversion, and appropriate intima-to-intima contact.
Patency Testing in the OR:
- Observation: A patent artery should pulsate distal to the anastomosis. However, a pulsatile transmission could still carry through a thrombosed anastomosis.
- Flicker Test: Place a closed forceps beneath the vessel distal to the anastomosis. As you stretch and gradually occlude the vessel, you will see alternating collapse and filling of the vessel.
- Milking Test (Double Occlusion Test): This test is somewhat traumatic. Occlude the vessel with forceps distal to the anastomosis. Place another forceps just distal to the first and milk the vessel for several millimeters away from the anastomosis. Occlude the emptied vessel, and release the proximal forceps. You should see rapid filling from proximal to distal.
- ICG: indocyanine green is injected into a peripheral vein. The vessels are illuminated with a laser, and the fluorescence is picked up by a charged couple device video camera. Flow is assessed by: (i) visual quality of the arterial anastomosis and flow, (ii) quality of the dye flow through the microcirculation of the flap and (iii) quality of the distal opacification distal to the venous anastomosis.
Clean Up:
When you are done, please be diligent about cleaning. Instruments can be sprayed with ethanol. The spray bottles should be located throughout the room. Place the instruments carefully back into the metal holding container near the microscope. Clean tables and cutting board with the ethanol spray. Turn off the microscope light. Throw away any unused chicken feet. Be respectful of researchers who are working in the lab. Do not work beyond your allotted time.